Curiosity isn’t what killed the cat, it was the rabbit hole it got stuck in.
I’ll tell you that’s how I felt when writing about plank pose, I was stuck in a dark damp rabbit hole 10ft underground with nothing illuminating the pathway out.
Have I been doing plank pose wrong? Have I been cuing plank pose incorrectly!?
With years of yoga education and experience teaching, plank pose had me questioning myself and everything I learned. I use several cues for plank pose, or phalakasana, in every class. I know how the actions change the way the pose feels in my own body, but I was struggling to reconcile their anatomical purposes.
** Reading Break ** This blog post DOES contain affiliate links of related products I love and they might even be pictured. If you click on a link and purchase a product (or service) it costs you nothing, you MIGHT even get a discount, and I MAY even receive a SMALL commission. This helps me to buy and drink coffee ☕️ in order to keep me awake and provide you with amazing free content 💗 Thank You for supporting my content 💋
After I opened 341 tabs in my browser for research – that lead nowhere 🙄, I decided to flip through the pages of my first yoga anatomy book by Dr. Ray Long.
The answer wasn’t there 😔.
But it was on his website 😃.
And I learned something new. Watch the video below to see all the ways you can adapt plank pose to your needs, and how to spice it up when you need to add some fire in your practice. Then read on to find out the cues that had me in the depths of a rabbit hole, and a key muscle you need to engage to get a straight line in your plank pose.
Plank pose variations are numerous, as you’ll see soon. In past blog posts, I break this down by sections of the body, but plank is one of those poses where each thing is so integrated it makes sense to list some key connections first.
Key points for all variations:
Elbows under (in line with) the shoulders
Head, shoulders, hips, and knees in a straight line.
Press hands (or elbows) into the surface so shoulder blades rest on top of the rib cage
Core engages – think top of hips move towards the low ribs, and top of hip points draw towards one another.
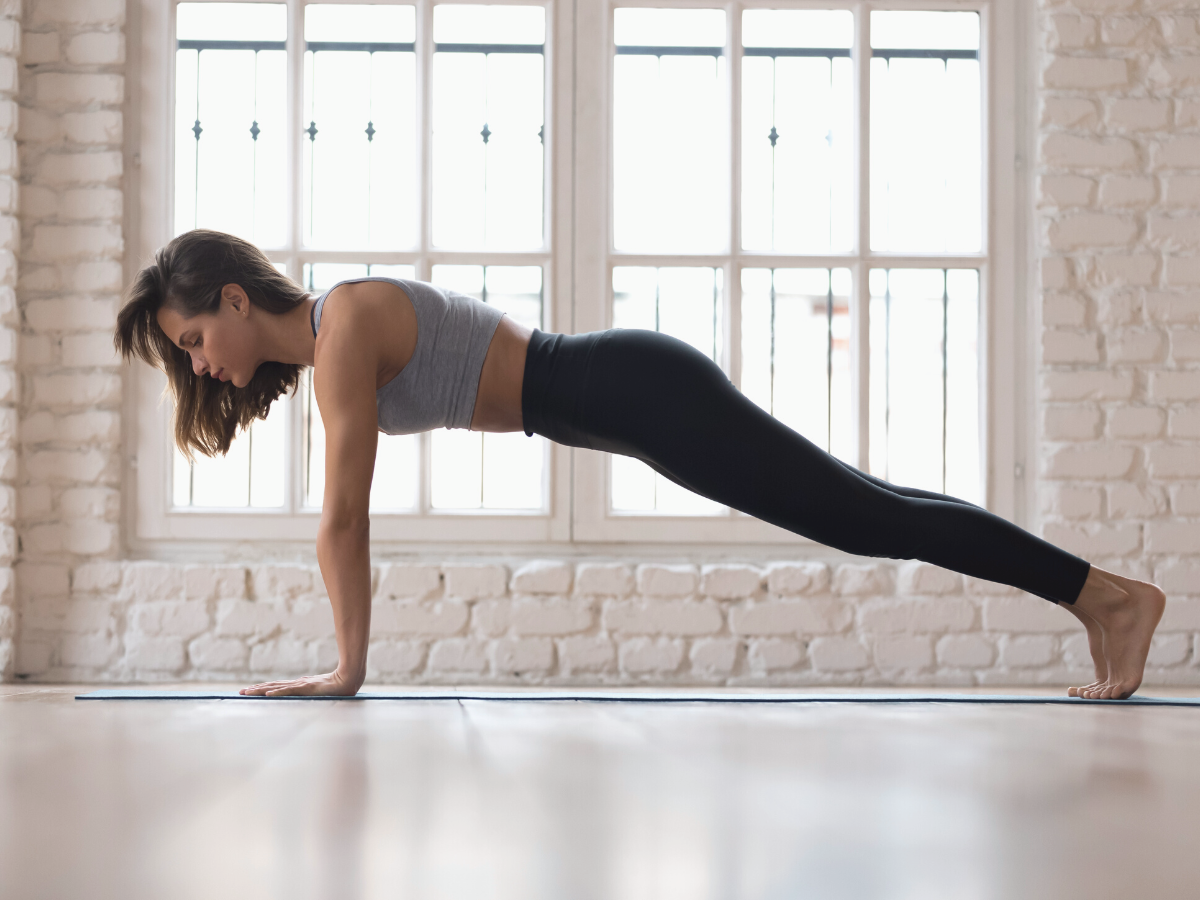
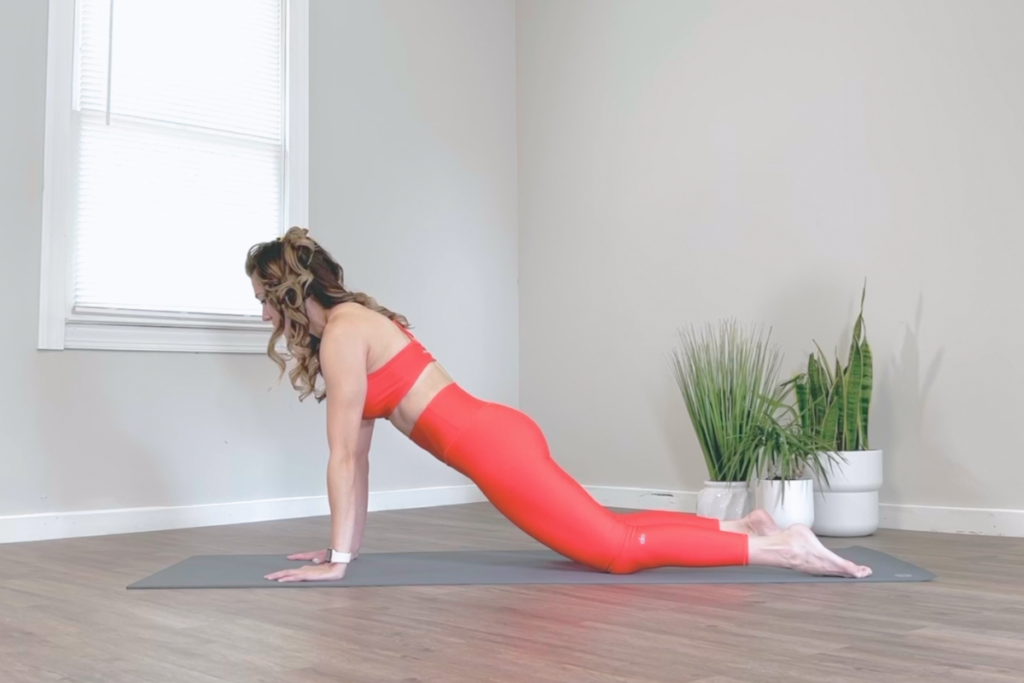
Now on to the body section break down. These notes are for traditional plank pose (phalakasana) with hands and toes on the mat.
The Legs
Toes curl under so that the pads of the toes connect to the ground
Heels press away
Inner arches lift
Inner thighs engage toward one another and up towards the ceiling
Knee caps lift
Fronts of thighs (quadriceps) engage
Tailbone reaches toward the toes
The Torso
Pubic bone/tops of the hips move towards the low ribs
Spine is straight and long
Important Notes
The goal is a straight line from lower supports (usually feet or knees) to the crown of the head. If a straight line doesn’t happen, try a different variation to find success.
The Upper Body
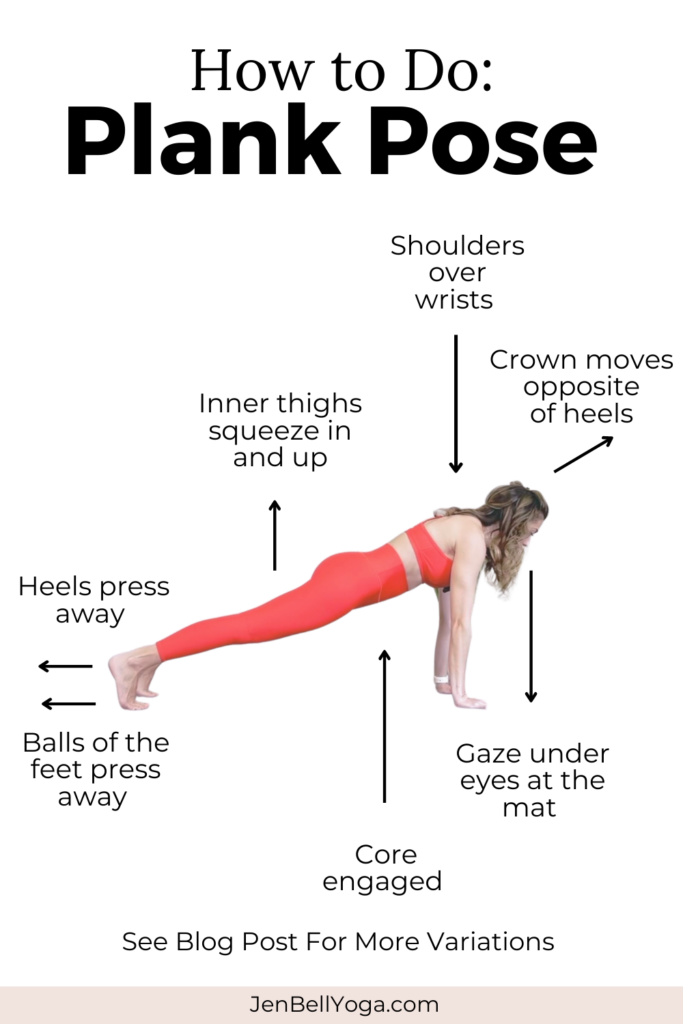
Wrists directly underneath (in line with) the shoulders
Insides of the elbows strive to rotate forward to face the top of the mat
Press the ground away so the scapulae sit flat on the rib cage
Shoulders move away from the ears
Chin tucks slightly so the neck is long
Gaze is at the floor about a foot or two in front of the hands
Important Notes
It’s common to see the gaze forward. Generally, this is OK, but it does require more neck extension which can exacerbate any tech neck/text neck/forward head posture neck pain. It’s also contraindicated for anyone with osteoporosis or osteopenia.
Another thing commonly seen is no neck muscle engagement with the gaze at the floor. This is contraindicated for anyone with herniated cervical discs.
Let’s Get Into It: How to Move In and Out of Plank
If you’ve ever flowed through a vinyasa or ashtanga yoga class you have moved from down dog, to plank, and into a chaturanga dandasana (aka low push-up). You then continued into up dog then back to down dog, and the cycle continued on, and on, and on 😅, until you curled up in child’s pose and waited for the class to end (or maybe you snuck out in the middle 🤨).
On the flip side, you may be a vinyasa junkie and do the double chaturangas and take the EXTRA vinyasas when the teacher offers it, or even when they don’t. You know who you are. Us teachers know who you are. And yes, we see you 🧐.
But for many people, it can be a challenge and painful to bear weight on your wrists, and vinyasas can be tricky. There’s all that slippage in down dog when vinyasa-ing into plank without a pricey yoga mat to support you.
With that in mind, I’ll explain a non-vinyasa approach to plank pose. This might be how you’d approach plank in a group fitness class, or when you want to bust out a tricep push-up.
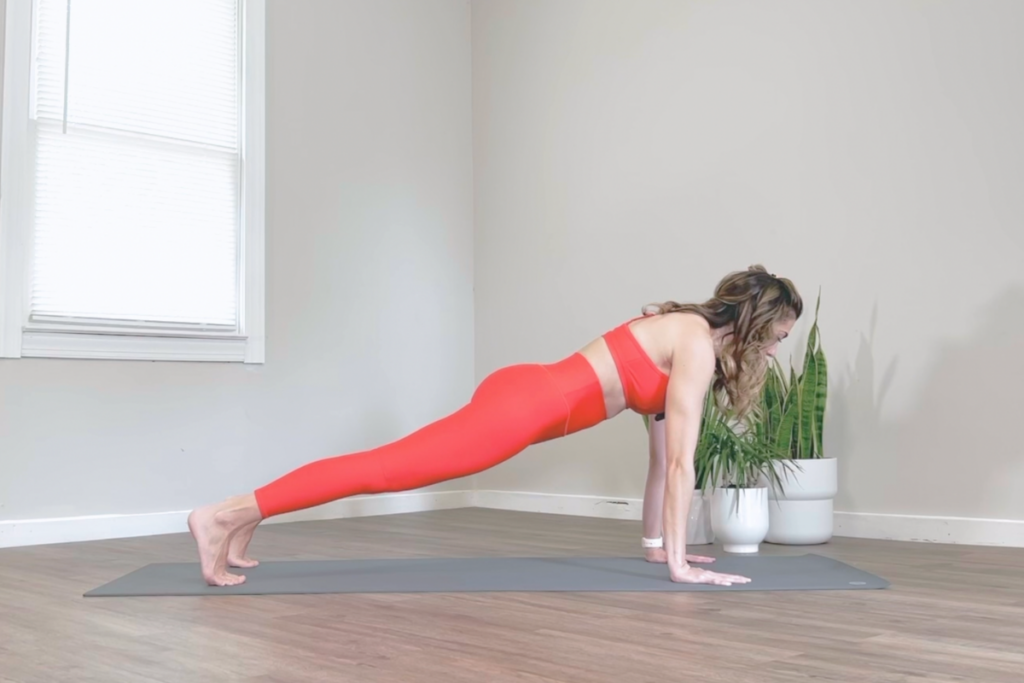
Moving In
Start in a tabletop position (wrist underneath shoulders, knees under hips)
Look straight down (about 1 to 2 feet in front of the hands)
Engage the core – draw the tops of the hips towards the low ribs, low ribs knit towards one another, hip points draw towards one another.
Press the hands into the ground, allow the insides of the elbows to roll forward and the collar bones to spread wide. You’ll feel the shoulder blades draw down and connect to the back of the ribs.
Step one foot back so the leg is straight with pads of toes connected down to the floor
Step the second foot back
Engages the inner thighs and pelvic floor by draw the inner thighs towards one another and up towards the ceiling.
Breathe
Moving Out
Lower one knee down to the ground
Lower the other knee down to the ground
Stand up, take child’s pose, take down dog, or lie down
Plank Variations: hard, harder, I’m a glutton for punishment
Plank is one of the best poses you can do for your core. With so many variations you can choose what works best for you – today.
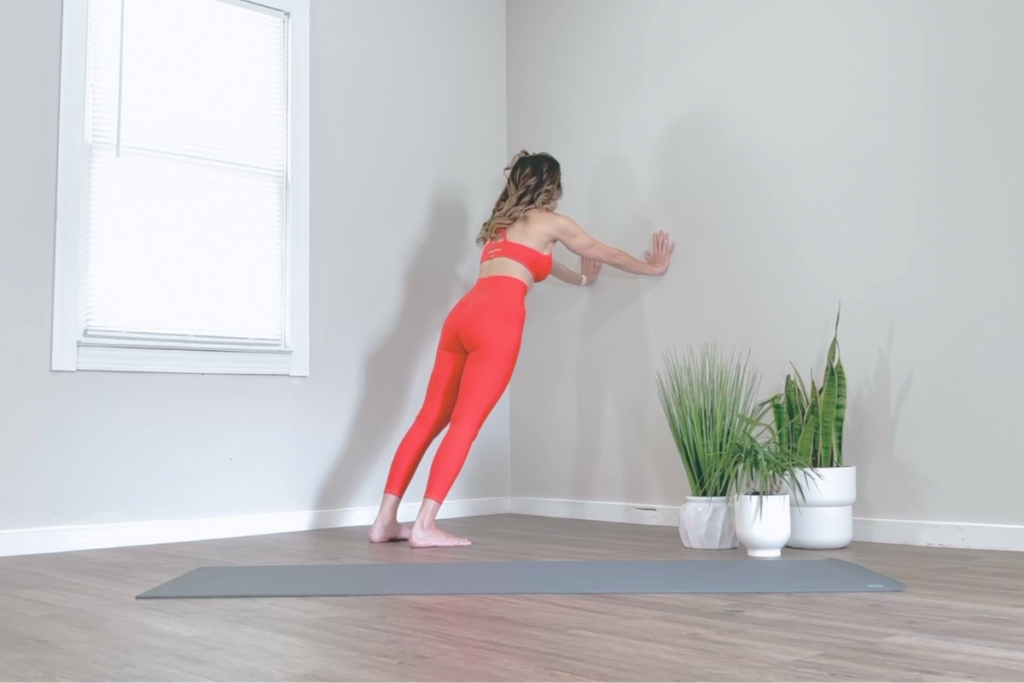
At the Wall
Reason: You’re new to plank pose out or you can’t bear much weight on your wrists.
How to do it:
Stand arm’s length from a wall
Arms reach out and away from the body at shoulder height
Wrists at shoulder or slightly lower than shoulder height
A wider platform to step up on to will make the distance guesswork easier
Once you lift your feet above shoulder height you start to work different muscles in the chest and arms.
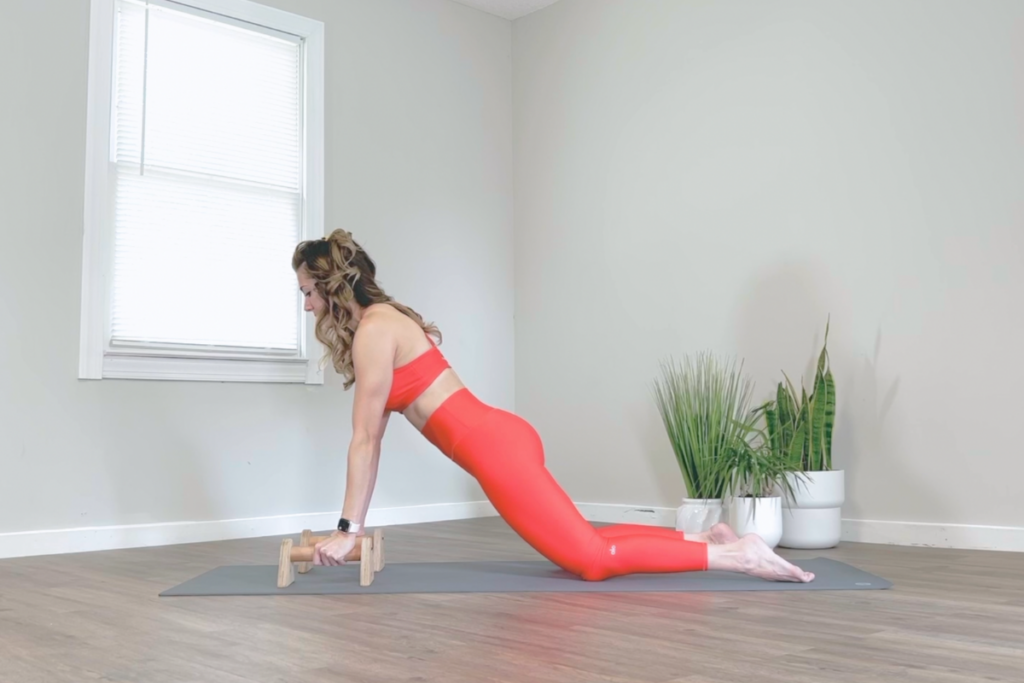
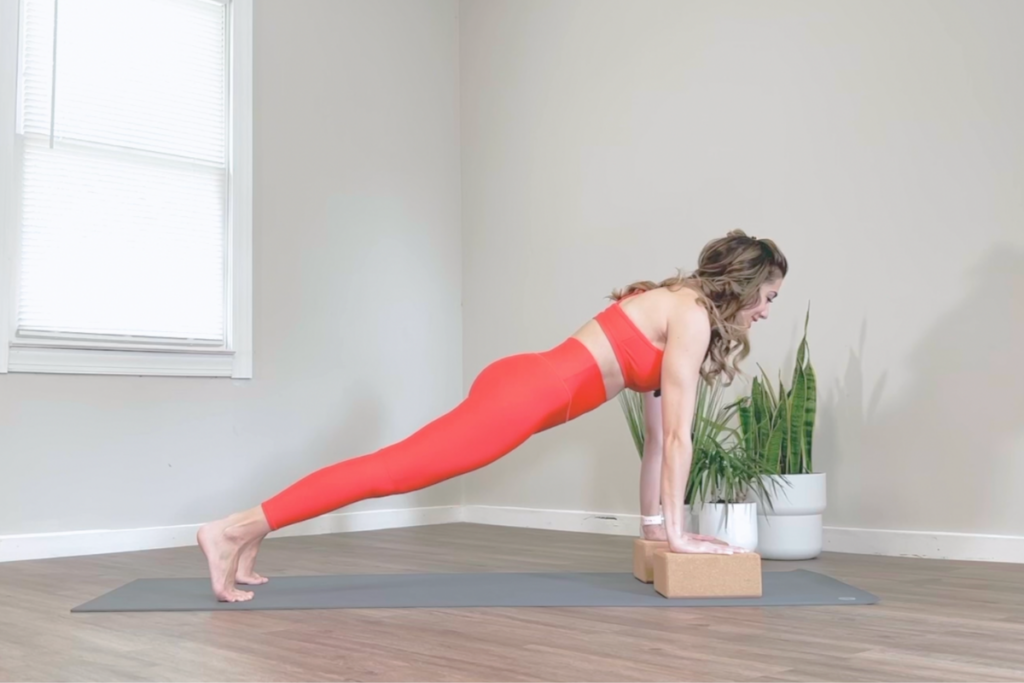
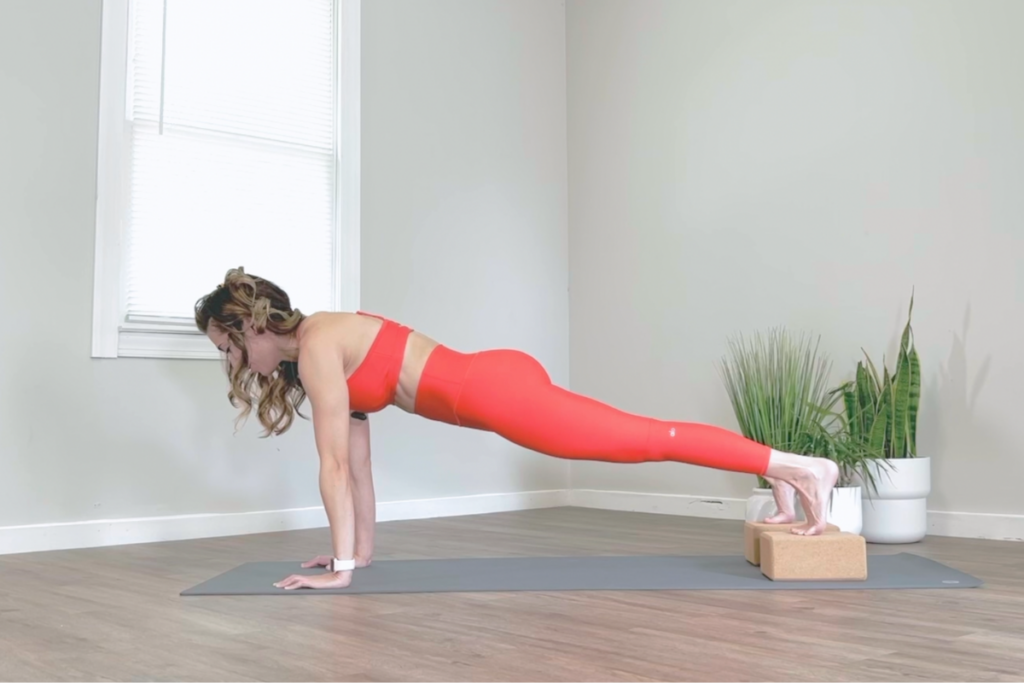
Protecting the wrists
Reason: You can’t extend your wrists far enough, you can’t bare weight on your wrists in extension, or you don’t want to place your palms on the ground.
To do it, follow steps 1-8 above and choose one of the options below…
Am I doing this Right? What you should feel in Plank Pose
Plank pose is all-consuming. You press your arms into the ground so you don’t face plant, your legs and glutes squeeze to make sure your knees and hips don’t sink to the floor, and you have to breathe on top of it all 😅.
So how are you supposed to know if you’re doing it correctly? Here are a few tips
Read the descriptions below, pick one part of the body, and notice if that’s what you’re feeling.
Videotape yourself doing the pose, watch the video, and correct what needs to be corrected one part of the body at a time.
Grab a mirror and glance at it while you’re in the pose, you’ll have more instantaneous feedback and can continually correct until it looks correct.
Ask a yoga teacher/personal trainer/fitness instructor for assistance or feedback.
Once the pose looks right, notice what you’re feeling where.
Important Note – Looking correct, doesn’t automatically mean you’re doing the pose correctly. It’s also important to feel the appropriate activation in the pose (see descriptions below), and find steadiness in breath and mind.
Lower Body:
Balls and heels of the feet press evenly away from the head and the inner arches actively lift up towards the crown of the head. You’ll feel an upward (toward the crown of the head) activation through the inner thighs (adductors), the pelvic floor, and the transverse abdominis. This action helps draw the energy up from the soles of the feet towards the head, which maintains that straight line of plank pose.
Fronts of the thighs (quadriceps) engage, you’ll feel your knee caps lift towards the crown of the head, which prevents the knees from bending.
Inner thighs engage towards one another and up toward the ceiling to stabilize the pose assisting in hip extension (straight line from toes through the crown of the head).
Glutes are active and engaged (not the strongest squeeze you’ve ever done), as are the inner thighs, to ensure the hips aren’t bent (hip flexion).
Trunk of the Body:
The spine and hips are neutral the transverse abdominis (the deep girdle abdominal muscle) engages to prevent sagging hips.
The muscles of the back (erector spinae and quadratus lumborum) engage (not excessively) to support the spine and keep the torso long.
Upper Body:
Wrists are bent 90 degrees (wrist extension) toward the forearms, middle finger points towards the top of the yoga mat.
Arms are straight (elbow extension) directly under the shoulder. The triceps and biceps isometrically contract to prevent elbow movement.
Insides of the elbows (eyes of the elbows) rotate towards the front of the yoga mat (supraspinatus engagement for external rotation).
The chest muscles (pectoralis major and minor) isometrically engage to prevent arms from splaying outward.
Shoulders move away from the ears (scapular depression through lower trapezius engagement).
Shoulder blades (scapula) are neutral, or slightly protracted (toward the sides of the body through serratus anterior engagement). This can feel like you’re pressing the floor away from you, or your back towards the ceiling, and this prevents the “winging” action of the scapula.
The chin tucks slightly to lengthen the back of the neck, and the muscles of the back of the neck engage to prevent your head from hanging towards the floor (erector spinae and the suboccipitals)
Gaze
Traditionally the gaze goes about a foot in front of the hands.
Let’s Nerd Out: The Anatomical breakdown of Plank Pose
This is a tricky one! There’s so much engagement and so little action for a straight line.
Muscles Worked
Adductor Magnus: Engaged to aid in hip extension to keep a straight line in the body
Gluteus Maximus, Medius, & Minimus: Used to prevent hip extension (hips collapsing towards the ground)
Quadriceps: To keep the legs straight (prevent knee flexion)
Transverse Abdominis & Erector Spinae: Used to support the lumbar spine
Spinal Extensors & QL: To support the lumbar spine
Pectoralis Major (& Minor): To keep arms adducted and wrists under the shoulder
Lower Trapezius: Used to depress the top scapula (move towards the hips)
Serratus Anterior: To protract the scapula
Supraspinatus: To prevent internal shoulder rotation
Triceps & Biceps: To prevent elbow movement
Erector Spinae & Suboccipitals: To suport the cervical spine
Muscles Stretched
Plank isn’t a pose you think of when you want to stretch, but for some people who type on a computer all day, run, cycle, or wear high heels every day, they may feel a little bit of a stretch in their:
Wrist flexors
Gastrocnemius
Soleus
Questions Answered & Unanswered
Did you see it?
How to get your plank in a straight line?
Your adductors, in truth one of the bunch – the aductor magnus, is responsible for the straight line in plank pose. (ok not by itself – those big glute muscles 🍑 also help, along with your core countering the action)
I love to cue “inner thighs move toward one another and up toward the ceiling” and it was one of the two cues that had me stumped and the answer was here (in the book excerpt at the bottom).
I assumed it was to encourage people to engage their inner thighs, getting the pelvic floor to lift, and the transverse abdominis to fire up (if the inner arch cue didn’t get it first). But now I know it is also to align the hips with the rest of the body. It’s a win-win-win-win 🙌.
And the second cue that had me stumped:
Eyes (insides) of the elbows forward
I couldn’t find the answer to this one, but I have 2 theories:
This is a setup for chaturanga dandasana where the elbows go back towards the hips.
It’s a cue to counter the standard western body posture where the average person sits with their hands on a desk the majority of the day. This leads to shortened pectoralis minor and major muscles which cause internal shoulder rotation at rest (eyes of the elbows turn inward). But we know the shoulders should be neutral in plank pose which means the eyes of the elbows are forward (look at any anatomy diagram to see what I mean).
I thought I knew everything I needed to know about plank pose before I wrote this post. I honestly thought it was going to be easy-breezy lemon-squeezy, but it wasn’t.
It’s always exciting to learn something new, and yes curiosity sent me down a dark hole, but I’m glad I found the answers and my way out.
Satisfy your curiosity and sign up for my newsletter. When you do, you’ll get my 1 min checklist to reduce stress, anxiety, and pain + guided audio.
1 min Anxiety Relief
Sign up for my newsletter and get my 1 min checklist to reduce stress, anxiety, and pain + guided audio.
Privacy is important. I won’t sell your info. I promise.